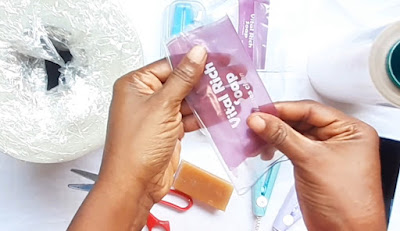
Soap packaging overview
- Introduction
- The items you will require
- Measure your soap
- Measure and cut the required nylon size
- Print on your soap packaging nylon
- Start the back sealing process
- Your product is ready for sales
Introduction to soap packaging
Here, I will be teaching you soap packaging for small and micro businesses. With this tutorial you will be able to excellently package your home made tablet soaps for sales. If you are very good in soap making, why delay further in turning it into a business. Soap making can be either your full time or part time business. Here I will teach you how to package your tablet soap.
Items you will require for soap packaging
The items your will require for soap packaging for small and micro businesses are:
- Tablet soap
- Packaging nylon
- Lined surface mini hand sealer
- Smooth surface mini hand sealer
- Printing materials
- A pair of scissors
- Tape for measurement
Measure your soap
For soap packaging the first step is to measure the height and width of your already made tablet soap with tape. This will enable you to know the height and width of the nylon you need for packaging.
Measure and cut the required nylon size for your packaging
Cut your packaging nylon into the sizes you have measured on the soap adding 1 inch allowance to the width and 1inch allowance to the height. These allowances are the provisions for sealing.
Print on your soap packaging nylon
Lay your packaging nylons well on the table and print your design/label on the nylon. For tutorial on how you can print label on your packaging nylon follow this link: https://www.vitalrichconcept.com The process of branding your product is easy and it's something you can do by yourself or you might engage the services of someone to do it for you. The tools and materials you require are very cheap and they are available in our everyday market irrespective of where you live in this world.
Start the back sealing process
Step 1
Follow this link back sealing tutorial from my YouTube channel to understand back sealing
After printing on your soap packaging nylon, seal up the back end with the smooth surface mini hand sealer since we will be using back sealer for this tutorial. When sealing the back, make sure you seal nothing more than 0.4 inch . Subtracting 0.4 from both sides means that the back sealing has consumed 0.8 inch from the nylon (0.4 + 0.4 = 0.8). This calculation is very important because if you seal more than 0.5 inch on the back,, then your soap may not be able to enter inside the nylon. Therefore do the sealing with caution. Visit my YouTube channel www.youtube.com/@vitalrichconcept for more videos on packaging for small and micro businesses
Step 2
Position your nylon well
After sealing, you position your nylon well by foldings and stretching the nylon in such a way that your design will be in the front while your sealing will be at the back. This is called back sealing method.
Step 3
Add your soap inside your packaging nylon
Carefully add your tablet soap inside your packaging nylon and make sure the design is at the center of the front while the sealing remains at the centre of the back. Also make sure that the soap is at the centre of the entire nylon.
Step 4
Seal both the left and the right ends
With the lined surface mini hand sealer, seal nothing more than 0.5 inch on both the left and the right ends this is because your made provision of 1 inch for sealing when you were cutting the nylon. If you seal more than 0.5 inch on both end, then you may find it difficult to seal up one end of the nylon. This calculation is very important so do it with caution. The lined surface will actually make the left and right end look like company sealed because it will give those ends design. This is the last sealing step.
Your packaged soap is ready for sale
Walah!!! Here comes our finished product on soap packaging for small and micro businesses. Your tablet soap is now ready for sales. You can pack them in dozens or which ever quality you want inside a carton or a bigger nylon for supplies and distribution. If you are selling them directly by yourself, then you may now display them directly in your shop.
Here is the end of our tutorial on Soap packaging for small and micro businesses.
If you really enjoyed this tutorial and you know it has been helpful to you, then share this blog with your friends and others.


Post a Comment
Leave your comment below